Create a Custom Statement with Lot Details
You can create a statement with Lot Details through the Custom Statements screen in Client Portal/Account Management.
New Client Portal
1. Click Reports > Statements.
The Statements screen will populate.
2. In the Custom Statements panel, click the + icon.
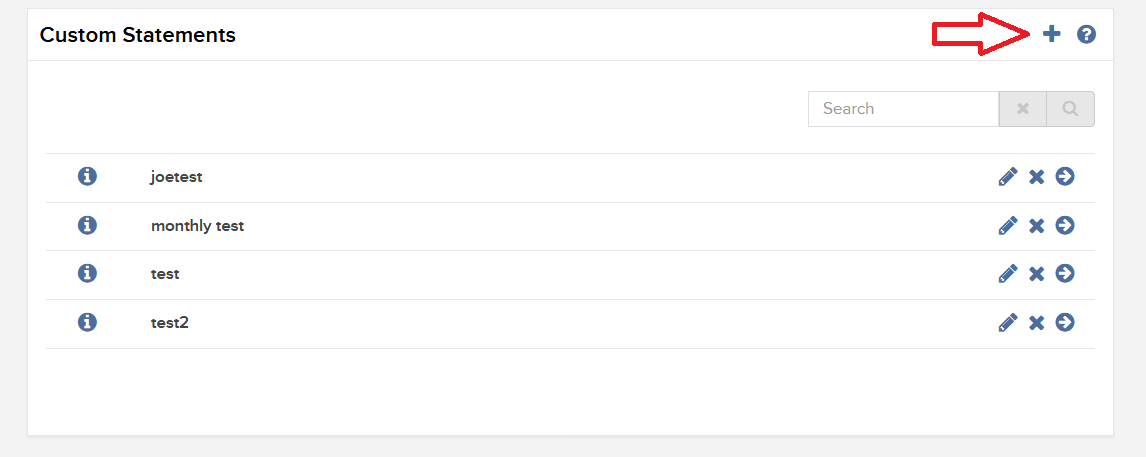
The Activity Statement Template screen will populate.
3. Click the + icon to create a new statement template.
.jpg)
4. In Activity Statement Details, enter a name for your custom statement, and select an output format and language. It will ask you to select a time Period as well, but this can be modified when you run the statement.

5. In Sections, click each section that you want to appear in your custom statement. Selected sections will appear with a check mark. The Open Positions section is where Lot Details will be located, so be sure to choose this option.

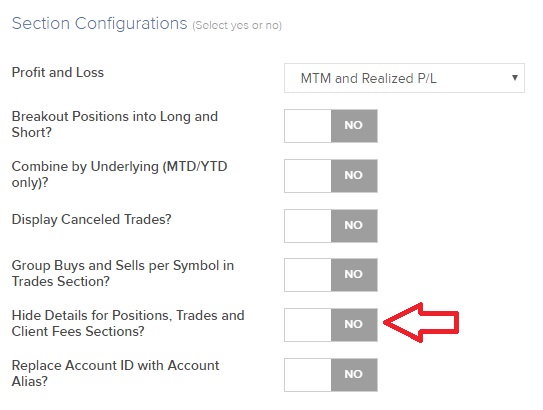
6. In Section Configurations, please select which options you wish to turn on in your custom statement. In order to ensure Lot Details are on the statement, select “NO’ for “Hide Details for Positions, Trades, and Client Fees Sections?”.
7. Click CONTINUE.
8. Review your statement template and click Create.
You can now run your new custom statement from the Run a Statement panel on the Statements screen.
Classic Account Management
1. Click Reports > Activity > Statements.
The Statements screen will populate.
2. Click on the blue “Customize Statements” header.
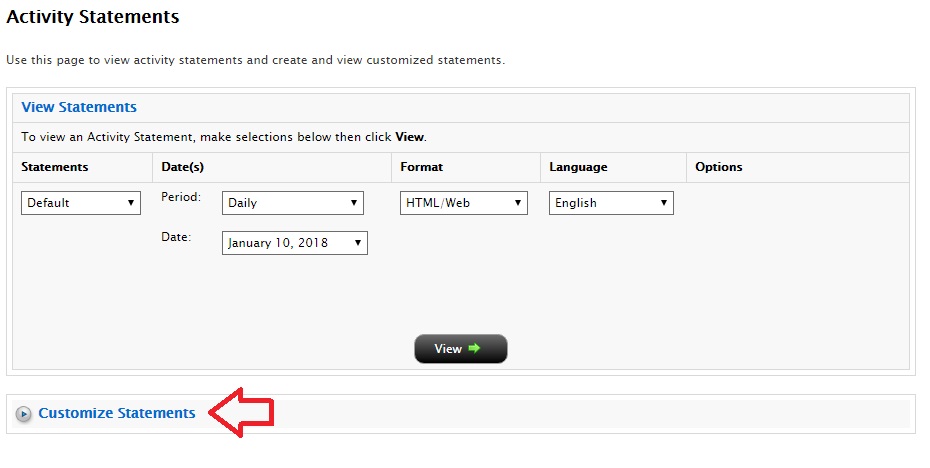
The Customize Statements section will expand/populate.
3. Select “Create New” from the first drop down menu, and enter a name for your custom statement in the “Statement Name” field.

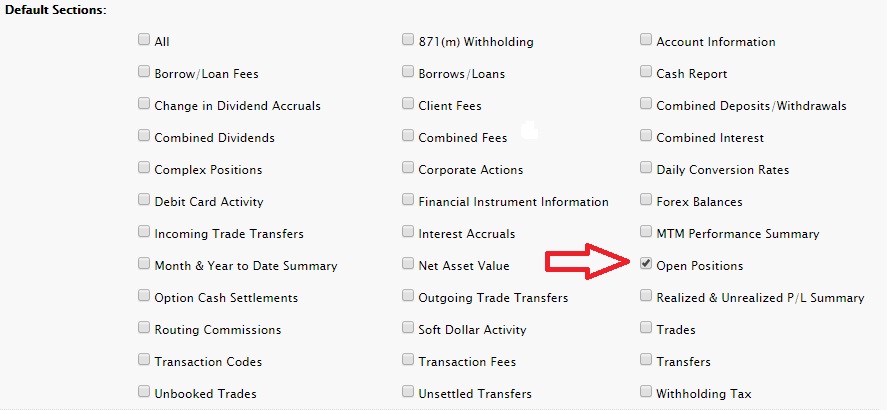
4. In Default Sections, click each section that you want to appear in your custom statement. Selected sections will appear with a check mark. The Open Positions section is where Lot Details will be located, so be sure to choose this option.
5. In Section Configurations, please select which options you wish to turn on in your custom statement. In order to ensure Lot Details are on the statement, UNCHECK THE BOX for “Hide Details for Positions, Trades, and Client Fees sections”.

6. Select your Profit and Loss Type, Statement Type (should be Activity Statement), Account number(s), Activity Period, Format, and Language from the drop down menus. While the system does ask you for a preferred Activity Period, this can be modified when you run the statement.
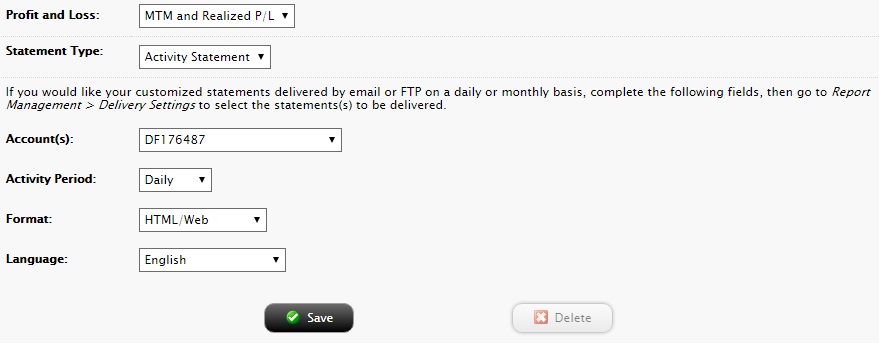
7. Click Save.
You can now run your new custom statement from View Statements panel on the Statements screen by selecting your new custom statement from the “Statements” drop down menu.