How To Request an IBKR Debit Card
概観:
IB LLC individual and joint accounts (excluding IRA accounts) are now eligible to request an IBKR Debit Card through Account Management.
In order to request an IBKR Debit Card, first login to Client Portal/Account Management and select Transfer & Pay. Under Transfer & Pay, click the option for "Integrated Cash Management".

The IBKR Debit Card Summary screen will populate. At the top of the page you will see a button to "Apply Now". Click the button to start your IBKR Debit Mastercard application.

The application page will populate with the Customer Agreement along with an option to Select an Account to link to your IBKR Debit Card. Click the "Add/Edit Accounts" button to make your selection.
.png)
Your accounts will populate on the right side of the screen. Once you have made your selection, your selected account will be highlighted at the bottom of the right-hand window. Once you are ready to confirm the account, click the "Continue" button.
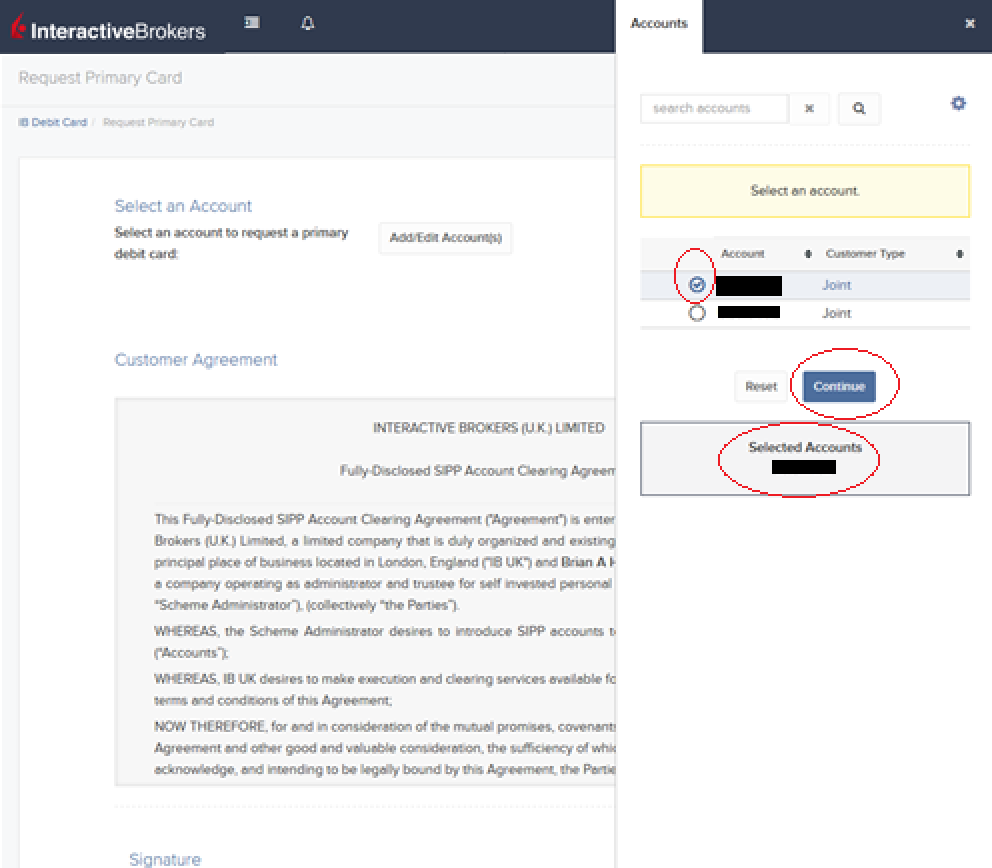
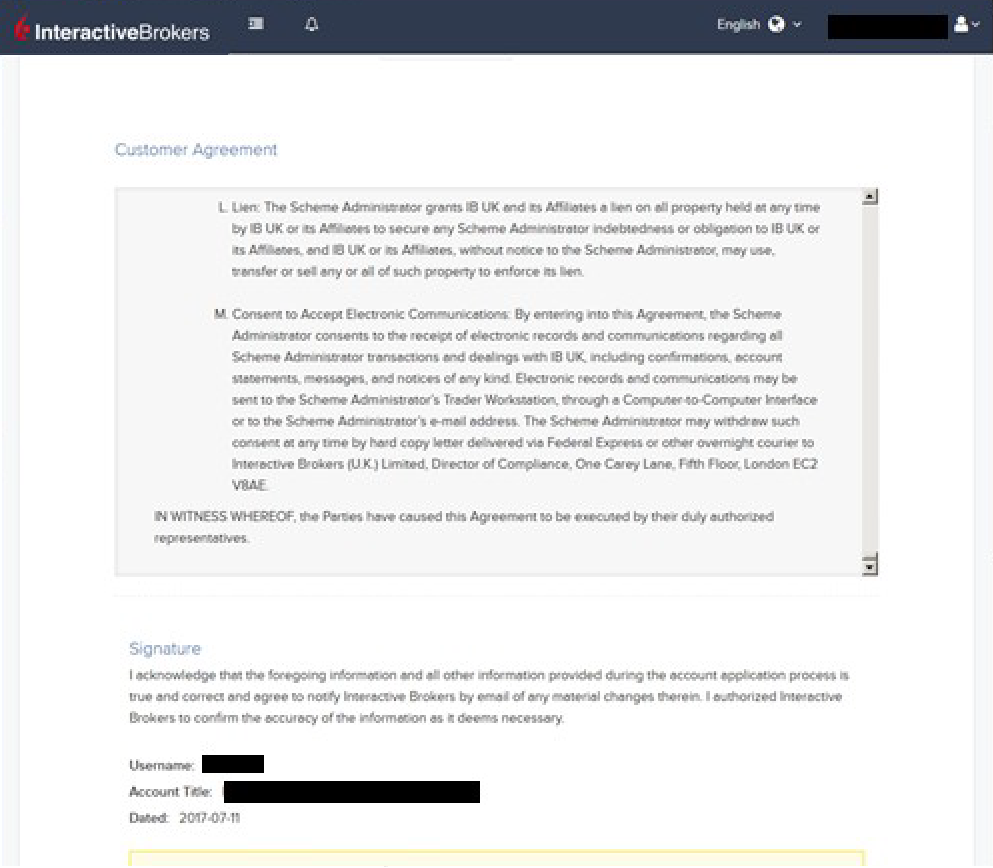
Scroll down to the bottom of the page where you will be prompted to agree to the terms set forth in the Customer Agreement by signing your name as it appears on the account. Click "Continue" to proceed.
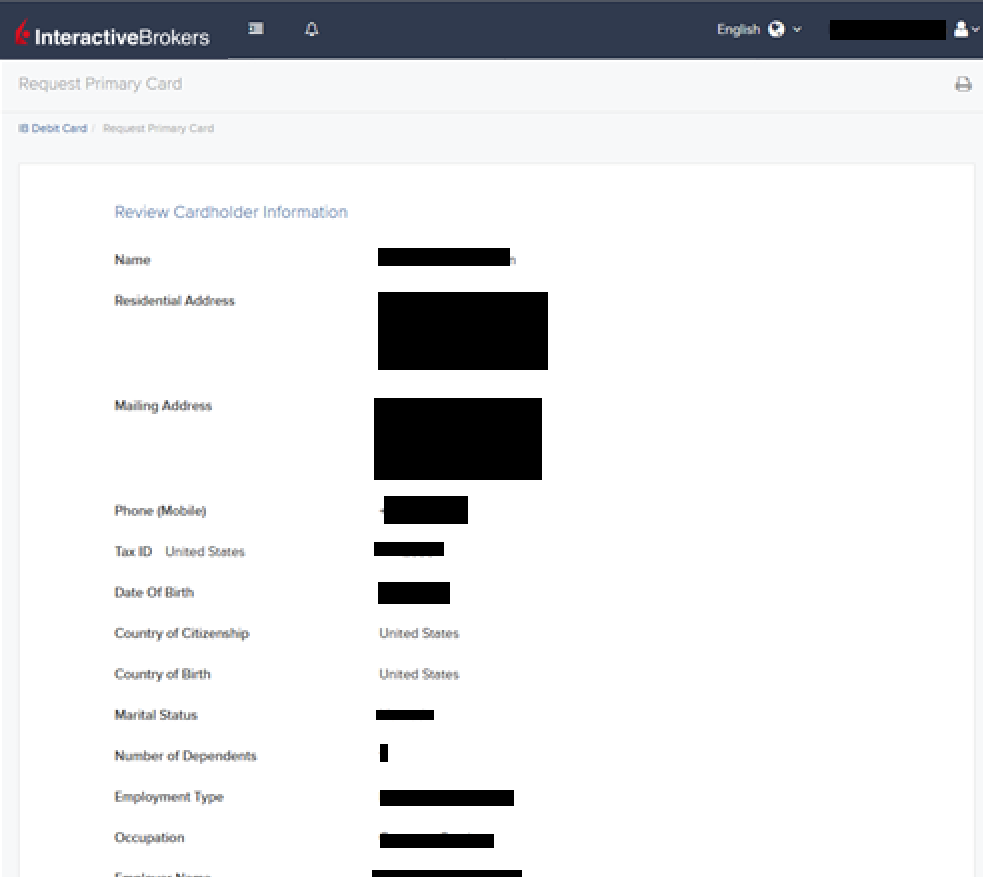
The next screen will ask you to review the Cardholder Information. The information should all be correct as it uses the information from your IBKR account. If the information is not correct, you will need to go into your account and change any incorrect information. If the information is correct, click "Continue" to proceed.
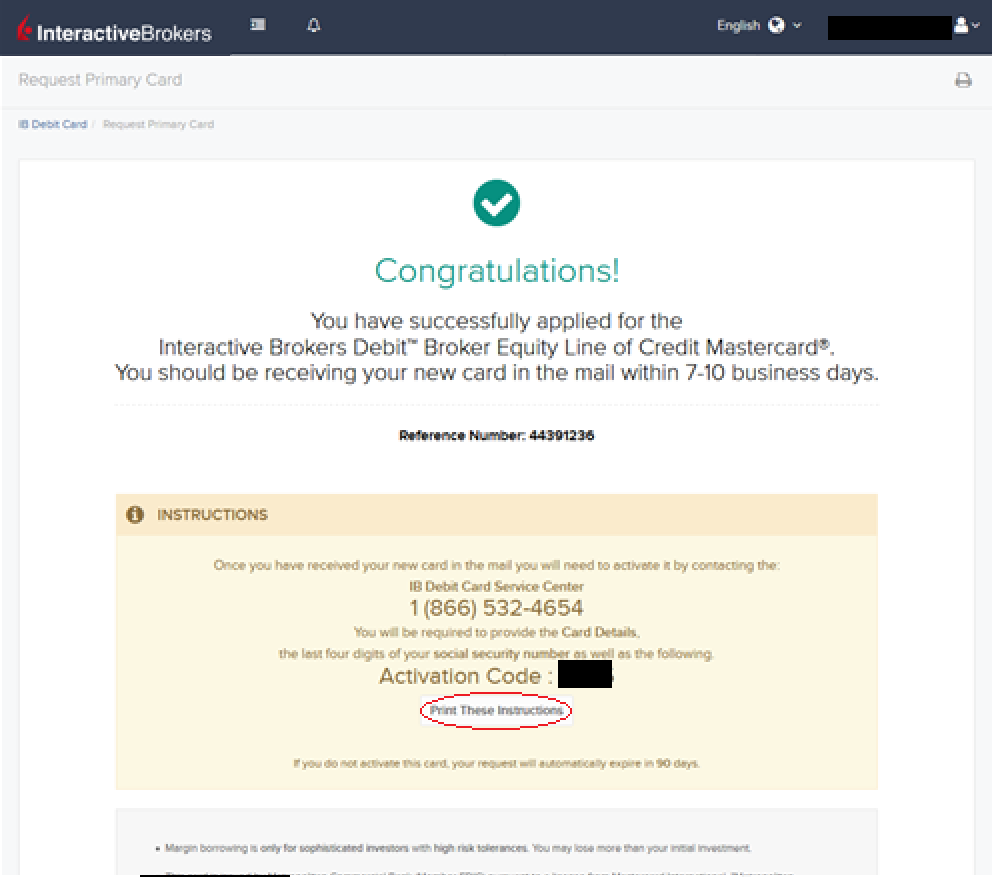
Once you confirm your Cardholder Information, your application will be submitted. You will receive a confirmation with a reference number, along with activation instructions for when you receive your IBKR Debit Card in the mail.
Forex Execution Statistics
概観:
IBKR clients can now analyze the quality of their forex executions in comparison to forex trades by other IBKR customers through the FX Browser tool in Client Portal. The tool provides transaction data for the 15 forex transactions that occur immediately before and after in the same currency pair of the client's transaction.
Note:
The number of transactions may be limited to fewer than the stated 15 as the NFA also has placed a 15 minute window on the query. Meaning, if within a 15 minute window before and after the customer's execution there are fewer than 15 executions the customer's query will return only those executions which occurred within the time window.
Accessing the FX Browser Tool
To Access the FX Browser tool, login to Client Portal using the Login button on our website. Click the Help menu (question mark icon in the top right corner) followed by Support Center. Please note, at this time only data for the live account will be provided.
.png)
From there, select "See Trades on IBKR's FX Platform" from the list of Information & Tools:

Submitting a Query
When the FX Browser is launched, you will be presented with the following screen:
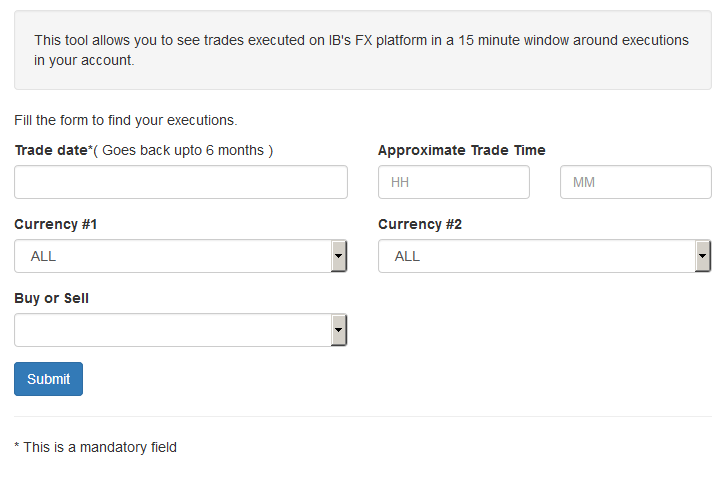
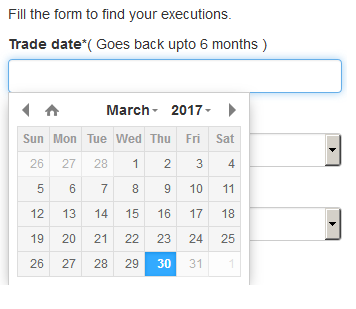
Please note that only Trade Date is a mandatory field in the query. When clicking on the Trade Date field, a calendar widget will populate and allow you to select your trade date. Only transactions from the last 6 months will be available to search.
Active customers may wish to limit the results by further selecting the currency pair, side or time of the execution.
Once the desired query has been entered, click on the Submit button.
The next screen will display the list of executions for the given account on the specified day. From there, you may select the execution you wish to receive the execution statistics on.
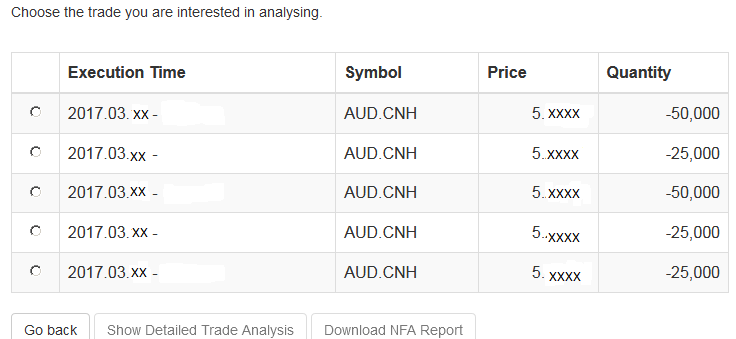
Once the execution you wish to view has been selected, click the "Download NFA Report" button.

Reading the Report
The results will be returned in a new tab and will contain the 15 executions before and 15 executions after the trade you selected on the previous screen. Per the note above, if fewer than 15 executions occurred in the 15 minute time frame only those executions will be displayed.
The query results will include the following information:
- Execution date and time, as expressed in Eastern time
- Side (buy or sell)
- Quantity (of Transaction Currency)
- Currency pair
- Execution price
- Commissions and other charges assessed by the FDM
- Currency denomination of commissions
Your trade will be marked as Trade Number "0" and the trades before and after your trade will be numbered from 1 to 15.
Error Messages
If the search criteria you enter does not bring up any trade information, you will be presented with the following error message:

How to update the US Social Security Number (SSN) or Individual Taxpayer Identification Number (ITIN) on your account
Background:
If you have been informed or believe that your account profile contains an incorrect US SSN/ITIN, you may simply log into your Account Management to update this information. Depending on your taxpayer status, you can update your US SSN/ITIN by modifying one of the following documents:
1) IRS Form W9 (if you are a US tax resident and/or US citizen holding a US SSN/ITIN)
2) IRS Form W-8BEN (if you are a Non-US tax resident holding a US SSN/ITIN)
Please note, if your SSN/ITIN has already been verified with the IRS you will be unable to update the information. If however the IRS has not yet verified the ID, you will have the ability to update through Account Management.
How to Modify Your W9/W8
1) To submit this information change request, first login to Account Management
2) Click on the Settings section followed by Account Settings
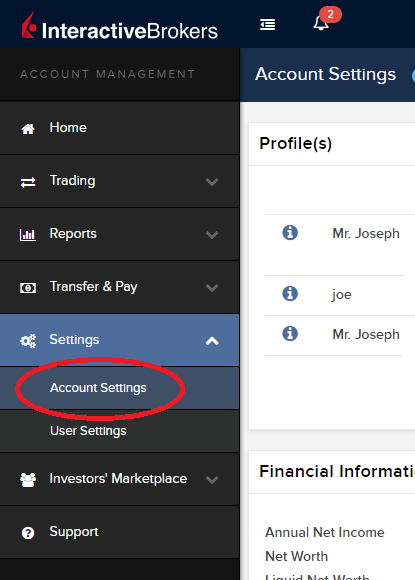
3) Find the Profile(s) section. Locate the User you wish to update and click on the Info button (the "i" icon) to the left of the User's name
.png)
4) Scroll down to the bottom where you will see the words Tax Forms. Next to it will be a link with the current tax form we have for the account. Click on this tax form to open it
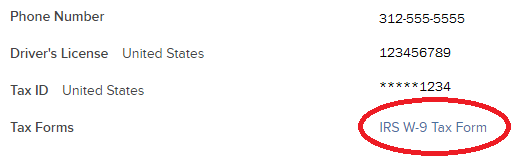
5) Review the form. If your US SSN/ITIN is incorrect, click on the UPDATE button at the bottom of the page
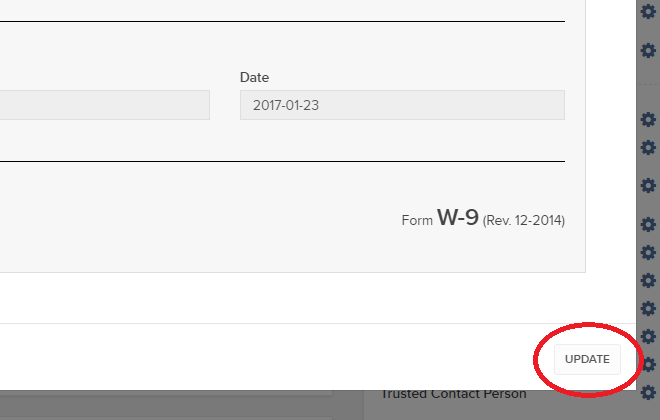
6) Make the requisite changes and click the CONTINUE button to submit your request.
7) If supporting documentation is required to approve your information change request, you will receive a message. Otherwise, your information change request should be approved within 24-48 hours.
アカウント・マネジメントよりメッセージサービスを有効化する方法
ここでは、携帯電話番号の確認の仕方をご説明します。
口座開設の時点で携帯電話番号の承認を行っていない場合には、下記の手順に従っていつでも確認作業を行うことができます:
- アカウント・マネジメントにログインしてください。
- サイドメニューより設定 をクリックし、そのあとユーザー設定をクリックしてください。携帯電話番号のギヤをクリックします。クラシック・アカウント・マネジメントをご利用の場合、この項目には上にあるメニューから進みます。口座管理 -> 口座情報 -> 詳細 -> プロファイルと進んで、「変更」のリンクをクリックしてください。
- 確認をクリックします

- ご利用の携帯電話のメッセージアプリに、弊社から確認コードを含めるSMSメッセージが送信されていますので、こちらを開いてください。
ご注意:メッセージの送信に数分かかることがあります。
- 受信された確認コードを、確認番号の欄に入力して、次に進むをクリックしてください。
- 正しいコードが入力されると、緑色のチェックマークがSMS承認済みコラムの下に表示されます。 次に進むをクリックして、作業を終了してください。
- 有効なSLSデバイスをお持ちでないユーザーは、二段階のログイン承認プロセスに自動的に登録されます。SMS経由でのログイン承認方法は、KB3196をご参照ください。
FATCA Procedures - Grantor Trust Tax Information Submission
概観:
Interactive Brokers is required to collect certain documentation from clients to comply with U.S. Foreign Account Tax Compliance Act (“FATCA”) and other international exchange of information agreements.
This guide contains instructions for a Trust to complete the online tax information and to electronically submit a W-9 or W-8BEN.
U.S. Tax Classification
Your U.S. income tax classification determines the tax form(s) required to document the account.
You must login to Account Management with the trust's primary username to access the Tax Form Collection page.
1. Tax Form Collection
The Tax Form Collection page lets account holders review and update important tax-related information and lets account holders electronically fill out an IRS Form W-9 (U.S. taxpayers) and IRS Form W-8 (non-U.S. taxpayers).
Accessing the Tax Form Collection Page
a. Click Manage Account > Account Information > Tax Information > Tax Forms.
b. Click the Update Tax Forms button to access the Collection page.
The Tax Form Collection page opens, displaying a form with tax-related information that should already be completed. (Advisors and brokers can check the status of client updates to this page on the Dashboard Pending Items tab.
c. Review the Trust’s information and update as required.
Confirm the primary tax residency of the trust beside the Tax Residency question, "In what country is the trust a resident for tax purposes?" Select the appropriate country in the drop down menu.
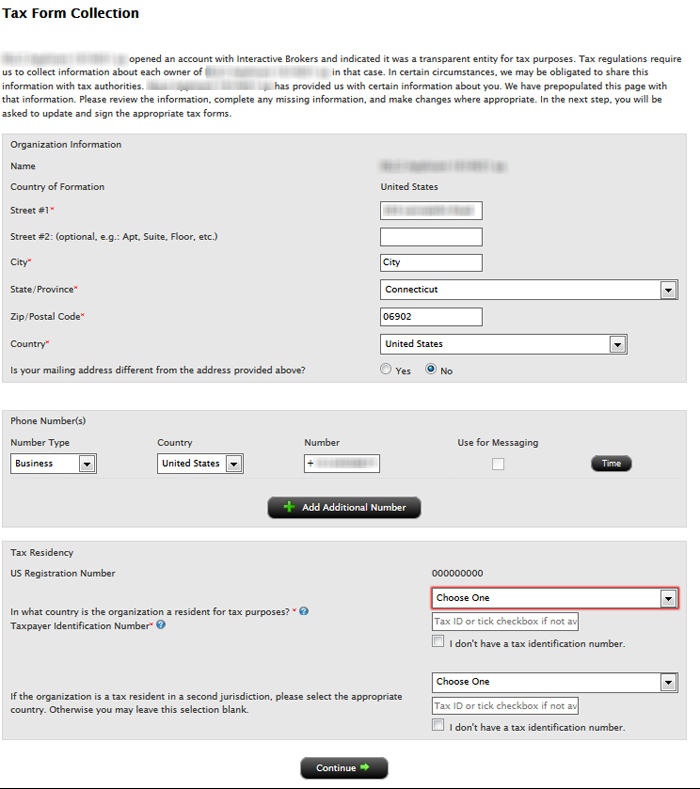
Select in the Tax Residency drop down menu the applicable country.
d. Click Continue.
2. Classification for US Tax Purposes
Confirming the Trust’s classification for U.S. purposes
a. Review the Trust’s status by confirming the question, “How are you classified for US tax purposes?” The answer is pre-filled based upon your information completed during the account application process.
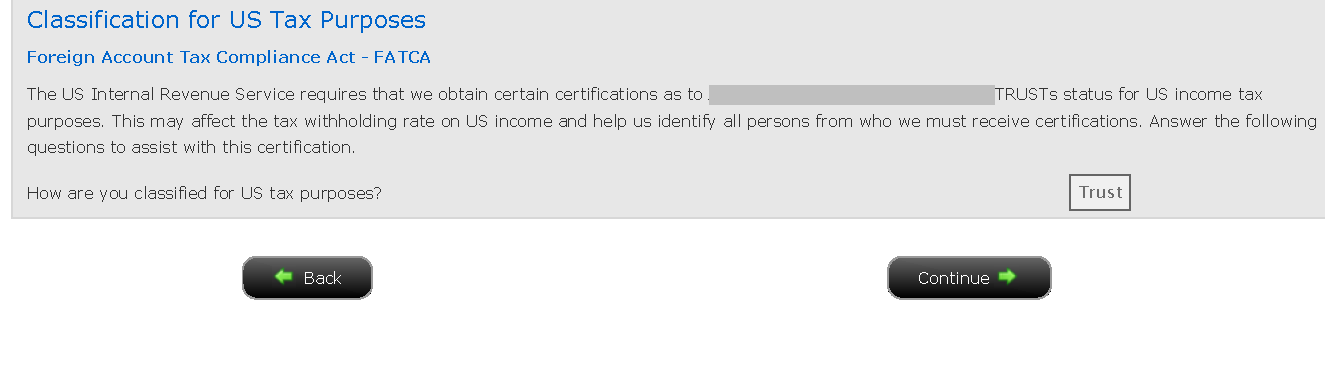
b. Click the Continue button to confirm the trust classification and complete the Form W-8 or W-9 for the entity.
c. Click the Continue button to identify each Grantor.
3. Identify Grantors
a. Click Manage Account > Account Information > Tax Information > Tax Forms.
b. Click the Create button beside each grantor to send each user the applicable tax questionnaire and to submit the tax certification form (W-8 or W-9).
Also, update the "Percentage of Ownership" to add up to 100%, if necessary.
.png)
c. Enter the required fields for the username and password for specified grantor and click the Continue button to complete the email delivery of the link.
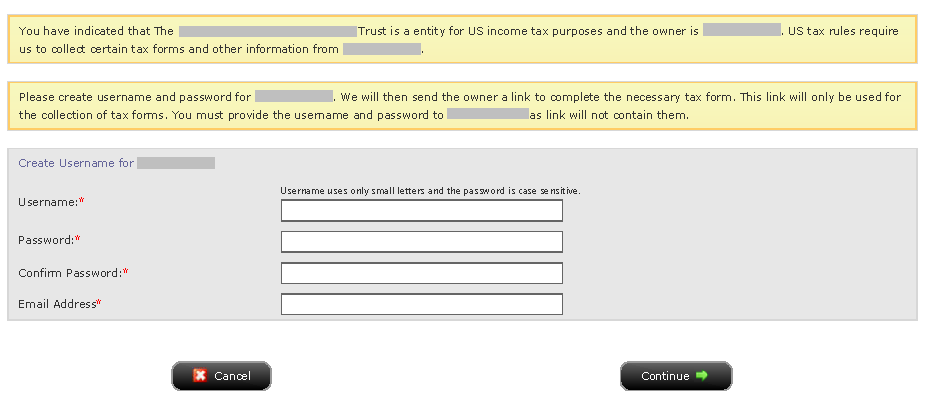
We will then send the owner a link to complete the necessary tax form. This link will only be used for the collection of tax forms. You must provide the username and password to the Grantor as link will not contain them.
Each Grantor must login with the username/password created and complete the pending tasks by going to Manage Account > Account Information > Tax Information > Tax Forms > Update Tax Forms.
d. Click the Continue button upon creating and sending usernames to each Grantor.
Disclaimer
This guide does not constitute tax or legal advice and Interactive Brokers cannot advise you on how to complete an IRS Forms W-8 or W-9. Instructions are for information purposes only and do not address all possible scenarios. Please consult your tax professional if you are unsure how to complete.
Delivery Settings for Shareholder Materials
IBKR’s default setting for distributing shareholder communications (e.g., proxy materials and annual reports) from U.S. and Canadian issuers is electronic delivery. Under this method the account holder will receive an email notice when information becomes available for a security they hold from our processing agent, Mediant Communications. This notification will provide the necessary links for accessing the information and voting through the Internet in lieu of receiving these documents via postal service. The technology which you will need to secure the information includes access to the Internet and a web browser supporting secure connections. In addition, you will need to be able to read the documents online and print a copy provided your system supports documents in a PDF format.
Other items of note:
- We recommend that you add the following addresses to your email address book to minimize the possibility of communications being routed to your junk folder or rejected by your email provider as spam: InteractiveBrokers@proxydocs.com, InteractiveBrokers@investorelections.com, InteractiveBrokers@proxypush.com, InteractiveBrokers@prospectusdocs.com.
- Issuers reserve the right, and are sometimes required by regulation, to send certain shareholder communications via postal mail regardless of the account holder’s preference for electronic delivery. This will most often be the case for interim or special meetings or for contested voting matters.
- Account holders may withdraw their consent to electronic delivery and revert to postal delivery at any time by submitting a request through the Message Center located within Client Portal. Note that changes to delivery settings are not applied to shareholder materials where the record date has already been sent. Account holders may, therefore, continue to receive deliveries for certain securities via the existing method for a period of 2 to 4 weeks after requesting a change.
- The information above applies solely to shareholder communications associated with U.S. and Canadian issuers. The delivery of communications for securities issued outside of these two countries is typically electronic, but managed directly by the issuer or its agent (i.e., not Mediant).
See also: Non-Objecting Beneficial Owner (NOBO)
Verification of Mobile Telephone Numbers
Background:
Clients who have completed the steps of verifying their mobile telephone numbers with IB will be able to receive account related communications directly to their phones in the form of a text message (SMS). This will help to reduce the need to access the Account Management Message Center for information on items such as Funding. In addition, a verified mobile number is a prerequisite for using the IB Key Authentication via IBKR Mobile or the SMS as second factor authentication.
Verification of a mobile number may be done through one of the following methods:
- Set up messaging for your mobile telephone number. Please see KB2552 for details
- Activate the IB Key Authentication via IBKR Mobile on your smartphone. Please see KB2260 for details
How to verify your mobile phone number
概観:
This article explains how to verify your mobile phone number.
If the verification of your phone number was not completed during the account application, you can complete it at any time by following these steps:
- Log in to Account Management.
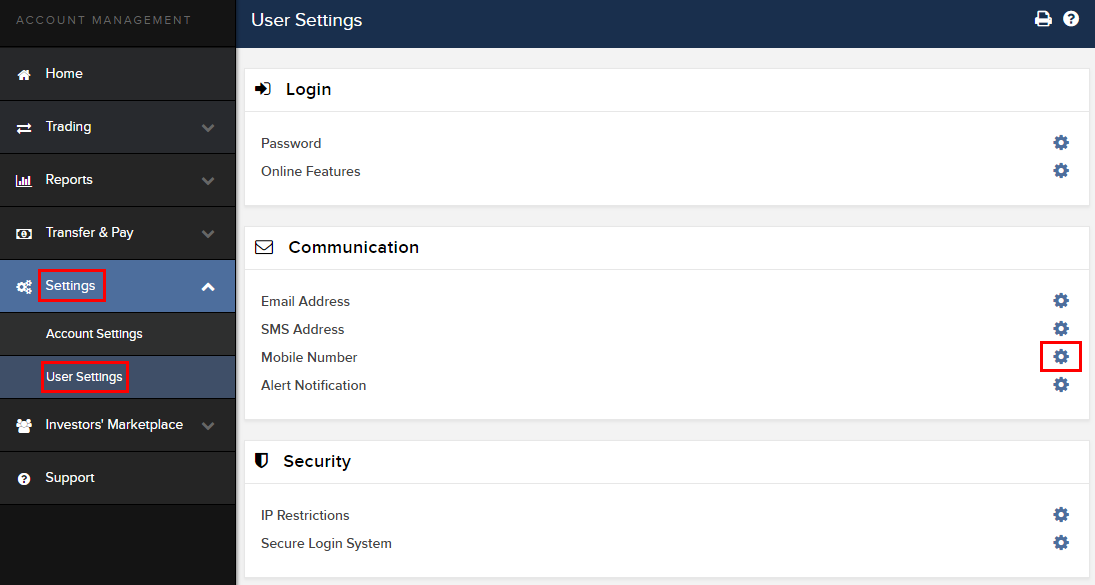
- From the side menu, click on Settings and then on User Settings. Click on the configuration gear correspondent to Mobile Number. If you are using the Classic Account Management, this section can be reached from the top menu Manage Account -> Account Information -> Details -> Profile, by clicking on the link "Modify"
- Click on VERIFY
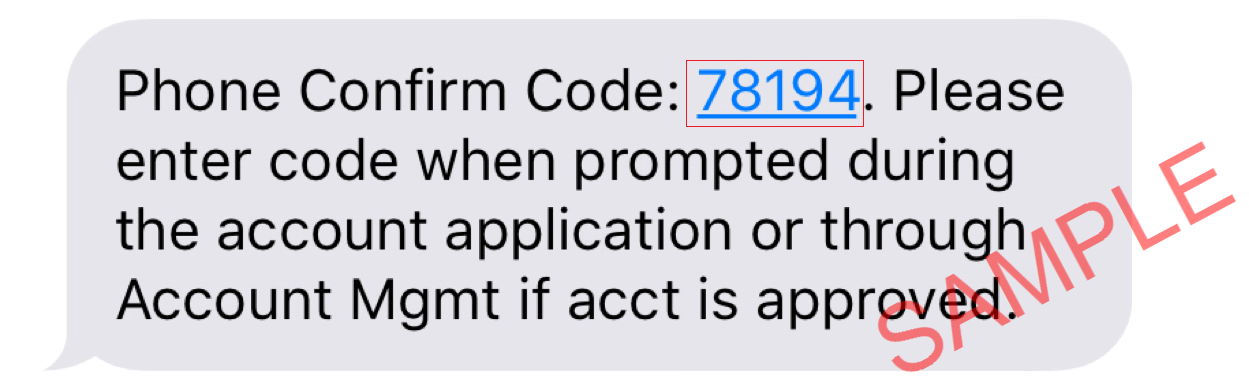
- Open your phone's messages app and you will find the SMS with the Confirm Code we sent to you.
NOTE: message delivery time may vary and in some circumstances it can take few minutes.
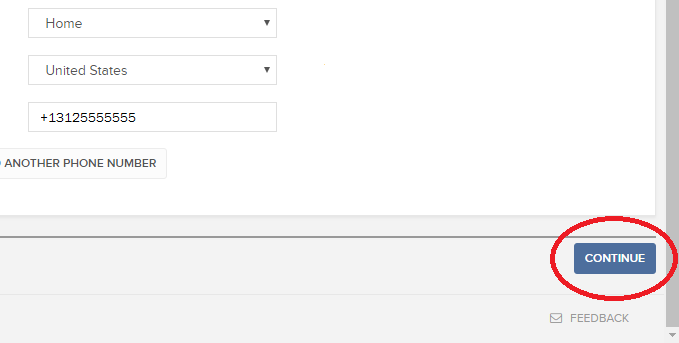
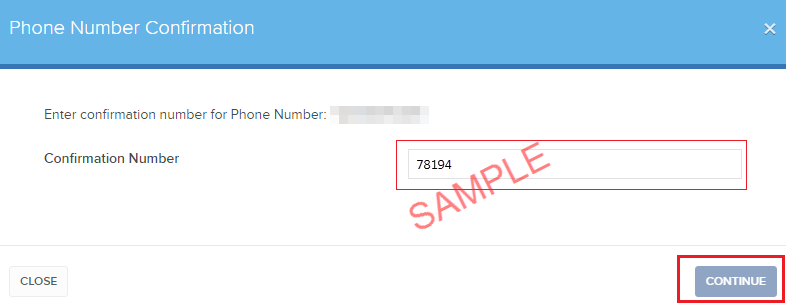
- Enter the Confirm Code you have received into the Confirmation Number field, then click CONTINUE.
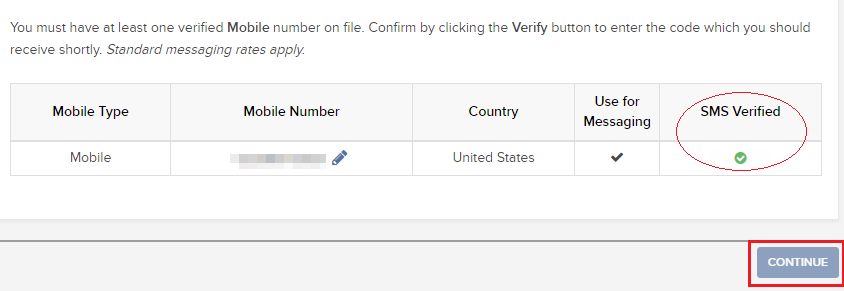
- If the code has been accepted, a green check mark will appear under the column SMS Verified. Click CONTINUE to finalize the procedure.
- If your user does not have an active SLS device, it will be automatically enrolled in SMS for Two-Factor Authentication shortly afterwards. For instructions about login authentication via SMS, please see KB3196.
出金リクエストの横に表示される「保留中アドバイザー」のステータス
概観:
Normal 0 0 2 false false false EN-US JA X-NONE MicrosoftInternetExplorer4
出金リクエストをしたクライアント口座のお客様はアカウントマネジメントの取引履歴項目で「保留中アドバイザー」とういうステータスが表示されることがあります。
-->概要:
クライアント・ポータルの取引履歴項目の中には、出金リクエストをしたクライアント口座のステータスが、「保留中アドバイザー」と表示されることがあります。
インフォメーション:
アドバイザー体系におけるクライアント口座は、個人口座と同様に、クライアント・ポータルにログインして出金リクエストを行うことができます。クライアント口座より出金リクエストが行われるとアドバイザーは出金を許可する必要がありますが、これが行われない場合、出金手続きは継続するものの最大で3営業日の延滞が発生します。
アドバイザー承認ステップ:
クライアント口座より出金リクエストが提出されると、アドバイザーは出金リクエストがある旨のEメール通知を受け取ります。アドバイザーはアドバイザー・ポータルにログインし、クライアント管理、ダッシュボート、保留中アイテムと進んで許可をします。アドバイザーは「許可」ボタンをクリックして、保留中の出金手続きを進めます。
保留期間についての注意点:
出金可能額の80%を超える金額の出金リクエストは、アドバイザーの許可が下りる、または3日間が経過するまで保留となります。出金可能額の80%以下の金額の出金リクエストは、アドバイザーの許可が下りる、または翌営業日まで保留となります。
この保留期間はお客様のアドバイザーに対して出金通知を行うため、および必要に応じては出金可能資金の準備期間として設けられています。
銀行ワイヤ送金による入金方法
ワイヤ送金による入金には、クライアント・ポータルでの入金通知の作成が必要になります。クライアント・ポータルにログインしたら入出金・移管、入金・出金とお進みください。入金・出金メニューの取引タイプより、「入金」を選択し、入金方法より「銀行ワイヤ」を選択します。
この後、入金額、通貨および送金機関を含める送金元の銀行情報を入力するようにとの表示があります。情報入力が完了すると、必要情報(例:ABA番号、Swift BICコード、口座番号など)が印刷できるフォームになりますので、この情報を銀行に渡してワイヤ送金を行ってください。
ワイヤ送金の際、銀行側で必要な情報は通貨によって異なりますので、この通知は必ず作成してください。 またこの通知により、ご資金の着金時にお客様の口座に即座に入金することができるようになります。
ご質問などございましたら、クライアントサービスまでお問合せください。お問合せ先および営業時間は下記のリンクよりご確認ください: http://individuals.interactivebrokers.com/en/index.php?f=1560